December 23, 2009

American Crafts for Springtime!

Merry Christmas! Are you ready for spring now? (Last year I found Cadbury Mini Eggs at Shopko on CHRISTMAS EVE. No joke.)

If you are ready for some springtime scrappin', head on in to Paper Pals and check out the new American Crafts Blue Skies line! A. Dor. A. Ble.

I had so much fun with these papers-- I had some photos waiting to scrap and these colors really worked well.

The layout of my niece was inspired by a Cathy Zielske who made a very similar hybrid page. I like the simplicity of her designs. It helps the photos you feature to really shine. Add a few paper flowers and brads, and you've got a layout!

I came up with my card concepts after being inspired by the great Remarks Journaling Stickers also by American Crafts.

Still to come-- another layout with these papers where I'll feature TWELVE photos on one 12x12 layout. Come back next week to see how to do it.

Until then, Christmas blessings to you and yours!
Pin It!

December 22, 2009

"Love, Love Me Do" and Cards!


I had fun putting together these cards using the My Minds Eye *Love Me Do* collection. My lighting was not the best when doing these .. so the reds look much more like burgundy. The first card I used swiss dot textured red CS. The pp is from the Love Me Do line which has designs on both sides. The die cut is part of the Love Me Do embellishment/die-cut sheet -- lots of fun circles, hearts, birds & so many more shapes which I used on my two layouts and also on these cards.

On the middle card I distressed/sanded the PP before putting it onto the CS. I highlighted with some rhinestones. Hey, a girl loves bling -- especially on Valentines Day. I topped the ric-rac border from the embellishment sheet with red ric-rac to provide texture & depth.

On the third card I again used the swiss dot red CS, the birds are from the embellishment sheet and also the half circle on the top left hand corner (it was actually a circle that I cut in half). I added the smaller circle (again from the embellishment sheet) and then added the black dots using a .05 marker.

The Love Me Do line makes card making easy. The papers are all reversible, fun to work with and the embellishment sheet tops it all off! Can't wait to see what you do with this line.
Pin It!

December 21, 2009

"Love, Love Me Do ... You Know I Love You"

Once I saw the theme of the new My Mind's Eye "Love Me Do" line ... just can't get the song out of my head. What a colorful line! I've been working on these layouts off & on for a few weeks. (Had to take my honeymoon during that time). So after a honeymoon, the Valentine papers were perfect. And also a great break from Christmas cards. The "Love Me Do' line is full of muted-bright colors. I'm one for using cardstock and then adding to the LO with the pattern paper. One thing about the Love Me Do line is the embellishments that come with the line. I chose the pictures from my layouts from my daughter & her family's portraits last spring. The playfulness of the paper highlighted the playful feeling of the pictures.

Pin It!

December 17, 2009

Pink Paislee Cupid Collection

I have to admit I was a little timid to head into Valentine's Day already, but it turned out to be a great escape from the reds and greens of Christmas I've been working with lately.


I hardly ever use paper exactly as it's supposed to be used (specific holiday) and this line was no exception. I found the color scheme of the Cupid Collection was perfect for scrapping this photo of my daughter in the mountains of Austria.


And then, lucky me, I just happened to have a photo of me and my guy at the top of the Eiffel Tower to go along with all of the great french-themed die cuts and border stickers. Again, it wasn't Valentine's Day, but there sure was a lot of love in the air!


Two layouts and I still had scraps left to make these cute cards.

This was the first time I've worked with Pink Paislee product and I was pleased. Lots of coordinating bright colors and embellishments, which was such a nice punch of spring during these dreary winter days.
Pin It!

December 16, 2009

Sister-to-Sister

The new Karen Foster "Sister-to-Sister" collection is the perfect paper for my two favorite sisters!
Pin It!

We R Memory Keepers....

I LOVE using this We R Memory Keepers divided page...what a fun and easy way to complete a layout with a little different twist!!
Pin It!

December 11, 2009

And now for the cards

I made the cards using my scraps from the Life Stories line from My Mind's Eye. On the "thinking of you card" I tried some folding and then stapled the folds and weaved a skinny strip of paper through the staples. The flower is just circles that I folded in half then in half then in half till I couldn't fold anymore. Then I put a brad in the middle to hold the four layers together.
Pin It!

My Mind's Eye-Life Stories-Page Two

This was a simple page. I stitched on my photos before adhering them. It gives the edges of the photo a raised look when you glue them down. The center of the page is actually an idea I got from the Oct 2009 issue of scrapbooks etc. pg. 24. I cut out the circle in the middle of the page and then backed it with red paper that I attached with adhesive foam. I tried to make the Merry Christmas circle look like an ornament. It doesn't really show well in the photo. The paper and punch outs are from the Life Stories line from My Mind's Eye.
Pin It!

December 10, 2009

My Mind's Eye-Life Stories

This paper is called "Description of Activity". I don't know if it is just the season but the paper made me think of Christmas. The words written on the side made me think of a vacation. So that is what I did. I also got a sheet of punch outs that would work great to journal with. I really like the look of this paper and it is so thick. I stitched on my photos before adhering them. I liked the journalling prompts on the right side. It made telling the story easy.
Pin It!

December 8, 2009

These are my final two pages from the 2 pieces of pattern paper and two pieces of card stock. The 12x2 strip on the left hand side does not stay in the pocket very well so when I scrap the other side of the photo sleeve I am going to adhere them to the sleeve with a staple or eyelet.
The sleeve on the top were I placed the title is actually about 12 1/4 inches long. Since I was running out of paper I used my scraps of blue to extend it a bit.
Pin It!

December 5, 2009

More We R Memory Keepers divided pages

Do you see a pattern here? These pages are fun to use and make quick layouts so easy. During this busy season these are a must have!


Pin It!

December 4, 2009

More We R Memory Keepers Sleeves


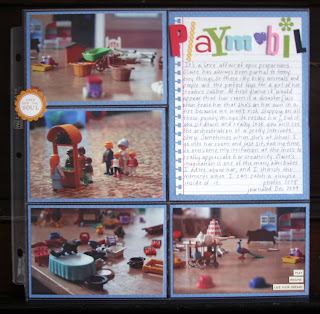
Here's my take on these versatile photo sleeves. My sleeve contained (4)4x6 pockets and (1)5x7 pocket, and although I didn't have a 5x7 photo I wanted to use, I did have a lot to say, so I included my journaling there instead. I decided to use the whole thing like a traditional scrapbook page, and after matting my photos and including a few embellishments, the layout took only about 30 minutes start to finish. I really like the results. These sleeve pages would make short work of a lot of photos in an appealing way, for, say, a trip to Europe.
(Yes I'm still working on my albums).
Pin It!

December 3, 2009

Photo Sleeves from We R Memory Keepers

The simple part of these photo sleeves is that it's so easy to crop and place your main elements (photos and background paper).

But don't let that stifle your creativity! After I filled the slots in the page, I added lots of embellishments on the OUTSIDE of the pockets to connect them all together.

I also found it easy to go hybrid with these. I don't have a 12x12 format printer, so all of my hybrid work has to be narrower than 8.5". So 4x6 (or in my case 4x12) pieces of paper are easy to create on the computer and print to add to the pockets.

I got to feature photos of my son as "speed racer" with his favorite little tricycle. It's been retired now, but it's sure fun to look back at the time he spent driving that little "motorcycle" around!

So I love these sleeves since they follow the great grid rule of good design, but when you "think outside of the box" you're not limited to staying in them!
Pin It!

More to add

I did two more pages with the amazing We R Memory Keepers photo sleeves. So far I have made 5 pages with 2 pieces of pattern paper and 2 pieces of card stock. I have enough supplies left over to make one maybe two more pages. Plus the pattern paper from Making Memories (Flower Patch) is double sided so when you slip it into the photo sleeve you can see the back of the paper. How thrifty is that? My pages are not jaw droppingly creative but they are fast and easy. I have taken a huge bite out of the stack of summer 08 pictures I had. I am feeling happy about that.
Pin It!

December 1, 2009

Easy Photo Sleeves

I am planning on using the photo sleeves from We R Memory Keepers for all my Summer 2008 Vacation photos. I have so many photos and these divided photo sleeves make it super fast and easy. There is not a lot going on in this page but I just wanted to show how super easy they are. I used the left over Making Memories flower patch paper I had from the original challenge.
Pin It!

Blog Archive