May 24, 2013

Amazing Art Squares!

The Paper Pals Design Team got a fun pack full of Art Squares from Inchie Arts to play with!  Here is what Karen, Mellena and Melissa came up with!


Karen made this card using a really fun and new technique using a Savvy Stamps Flower Owl Die, a 3x3 White Art Square, Tim Holtz Distress Inks, Clear Embossing Powder.  Lisa, the owner of Inchie Arts shared this fun technique with us.  The Art Squares end up looking like a glazed tile!

This next card by Karen uses an ATC White Art Square.  She stamped this great stamp called Painted Flower from Hero Arts with the NEW Hero Arts Ink Daubers applied directly to the rubber.  After stamping the image onto the Art Square; she masked out the flower and over stamped it with a script stamp in black archival ink.  While the mask was still on; she applied Ultramarine Blue Pan Pastel for the background. The finished card looks like a hand painted poppy!


One last card by Karen shows how fun the Black ATC Art Squares are when used with Hero Arts Chalk Ink.  The card mimics a mini chalk board! 


Mellena made this beautiful card using a 3 x 3 and 2 x 2 white Art Squares.  She painted the 3x3 Art Square background with Sparkling H2Os in Mediterranean blue; stamped the flowers using Hero Arts Wildflower Garden and black Archival ink; colored in flowers with Sparkling H2Os in Spiced Pumpkin and Coral Berry; and matted with a 3.25" x 3.25" piece of black cardstock.


Next, using a 2" x 2" Art Square, she painted the background with Sparkling H2Os in Bamboo; stamped the flower using Hero Arts Wildflower Garden and black Archival ink; colored in the flower with Sparkling H2Os in Cinnamon Stick (center) and Wine & Roses (petals); and matted with a 2.25" x 2.25" piece of black cardstock.


Mellena created a Mixed Media Canvas "the abc's of art" using four 2" x 2" Art Squares as dimensional embellishments. To make these squares, she cut 1.75" x 1.75" squares out of four pieces of coordinating cardstock, inked the edges with Vintage Photo Distress Ink, and adhered to the Art Squares.

Next, using Dyan Reaveley stamps (Dy's Alphabet Stamp Set for a,r,t, and Bordering On the Edge Stamp Set for abc) and brown Archival ink, she stamped the letters onto cream cardstock and cut around them, then used Vintage Photo Distress Ink on the edges. She adhered the letters to the Art Squares using small dimensional squares. Finally, She hand wrote "the," "s," and "art" with a brown Pitt pen and cut around them, inked the edges, and adhered them to the first square using dry adhesive.
As a finishing touch, she took a scrap piece of brown ribbon, folded it, and adhered it to the back of the "t" square.


With Zentangles being all the rage, Melissa tried her hand at using the 3 x 3 Art Squares for her designs.  The Black 3x3 Art Square was drawn with our favorite White Pen - the Signo from Uniball that  we carry at Paper Pals.


All of these products and Art Squares in a variety of sizes and colors are available
right here at Paper Pals!  Thanks again to Lisa for letting us play and create with her amazing product:  Art Squares!!
Pin It!

May 23, 2013

Surprise!

I love a great birthday line, and it was no surprise when I saw this great line from Bo Bunny. (HA! Punny...)

The "Surprise!" line is super duper... great classic colors with some contemporary flair. It had so many fun bits and pieces that were perfect for layouts and cards.

I have a need for a cute birthday card every couple of weeks and this line helped me design easy and super cute little cards. Pattern paper, border and word stickers and along with some cleverly cute buttons made these a lot of fun!

 Sometimes pattern papers with a background design can make it hard to fit your photos on the page the way you want to. This paper, however, was just right! The placement of the pattern made it easy to fit the photos I wanted to use onto the page.
 
 
 And as you can see, this works great for girls or boys, young or "old" (well, my tween isn't really "old" but when she has birthdays I can't believe she's not my baby anymore...) The word and letter stickers are really fun and I especially love the chevron pattern paper too.

What do you love most about birthday scrapbook paper lines?
Pin It!

May 22, 2013

"Scrap Your Life" Kit Club


I was so excited to be chosen to design samples for this coming Saturday's premier of Paper Pals newest kit club, Scrap Your Life. I recently posted about my adoration of the "Project Life" system of memory keeping, so I was excited to get my hands on the contents of this kit.

The kit includes an array of  We R Memory Keepers Albums Made Easy journaling cards from the Bloom line. On this page I cut them apart to fill in the small sleeves on the left and to present my journaling on the right top and bottom photos.

I used the stamp set included in the kit, Ali Edwards' "For Our Family", to make the brother and sister tags on the upper left photo.

The colors of the journaling cards were a perfect match for these pictures, don't you think?

I cut down two lined journaling cards and layered them on top of another card to create the middle journaling spots. I love cutting things apart and making them into something new.

And here is a sampling of the awesome cards I quickly made with a few kit leftovers.

The "Scrap Your Life" Kit Club would be the perfect opportunity to explore this method of fast and meaningful memory keeping. The kit itself is chock full of enough great products to document way more than a month's worth of life's little stories, including cardstock and coordinating paper from the Simple Stories paper line, as well as lots of other little goodies. I hope I have inspired you to call Karen at the store to let her know you'll be joining her on Saturday :)
Pin It!

May 21, 2013

Lifestyle Crafts Dies!


Hello Everyone,

I used 3 different die/embossing sets from Lifestyle/QuicKutz (nesting set, Doiley and flower sets)
The paper Line I used was from Crate Paper (Really Cute) & white cored Cardstock from Penny Black!


I love white core you can sand it,rip it distress it and it all looks great.
I made a set of 3, 4 1/4 X 4 1/4 cards cutting out part of one side of the and turning the die cut over show the other side of the paper then adding an embossed doiley or flower from the the other sets.


I folded a card and slid the paper down to leave the fold showing in the center of the die and made an apron card.

Tracy Mathia
Pin It!

May 20, 2013

Ruby Rock It "cook"


Ruby Rock It! "Cook", I love this line!!! There are so many possibilities!  There are these sweet feminine flowers and these bold boyish prints and lots of ledger and pale patterning going on!  I also used the "Little Yellow Bicycle" Journaling stickers.  They are transparent and easy to place and re-place on anything.  The lettering is bold, delicate and scrumptious ! I had so much fun with this paper and the lace that it comes with. I tried a simple lay-out and just put little tiny papers sewn to the edges, I did a grungy boy lay-out with lots of texture, and I did a feminine lay out with lots of little layers for the photos of my daughters.  My daughter Effie did the cards. What can I say? It was a blast!
Pin It!

May 19, 2013

Preserving the present...for the future!

Scrapbooking is, for me, not only a fun and creative way to spend time....it's also important to me to preserve precious memories for our grandchildren.  I love scrapbooking, and my love for the craft only grew once I had these precious additions to our family!  I finally "got over" the need to scrapbook chronologically, and just enjoy creating layouts, mini-albums, cards and so much more with the "way too many" photographs that I have.

This past Christmas I created mini-albums for each of our grandchildren (using the We-R-Memory Keepers 8X8 leather albums), and it was so fun to see the reaction of the kids when they opened them! They were among their favorite gifts---right up there with the toys! :0) 

Jim and I took our two oldest grandchildren with us to Washington, DC last May, and when we returned I made scrapbooks for them with all the pictures we took on the trip. They love looking through the scrapbooks and remembering all the fun things that we did!!

In short....scrapbooking is such an important part of my life (I have a whole room in our house dedicated to this craft!!)  It's been wonderful to get all the pictures I have out of the drawers and boxes and into scrapbooks to be enjoyed for many, many years to come!!

Scrapbook layouts...


Mini Albums...


Cards...
 
 
Bookmarks...
 
Pin It!

May 16, 2013

Julie Nutting Paper Doll Stamps are AWESOME

I am in love with these stamps!

They are so stinkin cute, and there are so many ways to use them here are a couple links of how to use them that you really need to check out.

 http://pinterest.com/pin/65654107040605037/

 http://pinterest.com/pin/65654107040603148/

    They have been uber popular since their release this year.   I couldn't wait to put them to use in my Art Journal, in fact I went to bed thinking about them and when I woke up I actually had an idea for the perfect page! My only problem was that the picture in my head was pastelly,( hmmm not sure if that's a word but I'm gonna use it) and I wasn't sure if I could get my dylusions sprays to be pastelly . But I decided to give it a try, here it goes I will walk you through the steps I used to create this page-

Here are my "ingredients" and as usual I had a few more pop up along the way that missed the line up picture.

 
First I used these dylusion sprays and to cover my page

 
Blotted that dry and ghosted over it with the flower frenzy stencil by TCW. 


I added some green to the bottom using a lime green gelato stick, then rubbed that in with a wet wipe.  


 I stamped my Paper Doll on using archival black in. Then with the same ink and a dylusion stamp set I added a bit of a border.
Stamped using the Hero Art white chalk ink and dylusions background love stamp. 

Because I wanted a close match to fill in my leaves here I used some acrylic glazing liquid mixed with the fresh lime spray I had used before to mix up the perfect paint/glaze for my leaves.


Then added a title,  excuse my very sad hand writing please, and the color on this last pic, not sure what was going on there.


So I like this a lot, but not quite the colors I was going for, so I tried out some sprays that Paper Pals is now carrying called Radiant Rain Shimmering Mist.

I am in LOVE- these were exactly what I was looking for!!!   .For this page I followed the same process, except I used the Mixed Media Border Stamp that goes with the Paper Doll Stamps for my border. Added a layer of stenciled spray, and used the TCW Mini Brick stencil.   


I printed out my page quote and stuck in on using gel medium. 


Added some shading with my handy dandy pitt pen.  And here we are :)

The Radiant Rain mist colors I used were- Pink Grapefruit, Spanish Moss, Bashful Blue, and Sunburst.
Lg TCW stencil scallop flowers for the ghosting and I believe the swirly garden stencil for texture.


Pin It!

May 14, 2013

Trends - Ombre'

There are so many trends coming and going in fashion, hair, home decor and paper arts!  One of the latest trends I have noticed is Ombre.

The definition of OMBRÉ: having colors or tones that shade into each other —used especially on fabrics in which the color is graduated from light to dark. 


From Ombre' Hair Color to Ombre' Nails!
  

I love the look of Ombre' when it is used with monochromatic colors - 


From Cakes to Cardstock!


Bazzill Cardstock at Paper Pals

I thought I would try out this trend with some of the supplies we sell here at Paper Pals!
My first project was using one of my favorite paper art supplies - Bazzill Cardstock! On the card below I border punched the New Trellis Two Edge Punch from We R Memory Keepers


 AND then Embossed  Daisy, Cantaloupe and Flamingo Cardstockto create my own Ombre' pattern.  I added some of our satin ribbon and I think I got it!


 My next trend task was to use two Pan Pastels over a stamped image. I stamped this great stamp we have -  Wildflower Garden from Hero Arts with Versamark Ink


then I applied Magenta and Orange Pan Pastels over the stamped image with a SoftTool sponge. I love how the the two colors blend into 5 different shades of color!  To top it off I tied an Ombre' Ribbon from May Arts - All from Paper Pals!   So easy, yet so dramatic!


This next project technique was shared with me by Lisa Lee of Inchie Arts!  She has come up with an amazing line of Art Squares that can be used with so many mediums and techniques! 
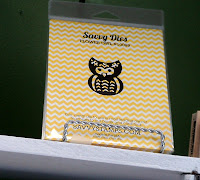
I used one of our NEW Savvy Stamps Dies - the Floral Owl


This fun masking technique was done using a 2x2 White Art Square, the Savvy Owl Die impressed into the Art Square using a Die Cutting Machine, Tim Holtz Distress inks: Marmalade and Blue Jean covered with clear embossing powder.  I love how the complementary colors of orange and blue create this great Ombre' blend!


My final sample is shown using another Art Square, stamped and painted with Twinkling H2O's!
All carried here at Paper Pals!


I encourage you to be a trend maker and play with the use of color as Ombre'

Karen ~


Pin It!

Blog Archive