My Mind's Eye has done it again! This may be my favorite Halloween paper and accessories line. Ever.
Every piece of paper is double sided, which allowed me to have so many options for this page with only a couple of sheets of the paper. When I dropped off my creations today at the store, I couldn't help myself...I had to have some of every sheet (black cats, pumpkins, the cartoon figures in costumes, argyles, polka-dots, etc.)
There is also chipboard accessories, ribbon, and amazing clear rubber stamps that round out this line and make it a snap for you (and me) to create great pages and cards.
Now, for a little challenge. Head into the store to see what is different on the layout or cards from what you see in the photo of the creations. Because this is a "must see" challenge and posting on the blog will give it away, email me at anitacory@hotmail.com to tell me what you notice by next Monday (September 6th) and I will randomly select one of the responders and award them a prize!
Enjoy!
Anita
August 30, 2010
August 23, 2010
It's beginning to look alot like Christmas .... seriously!
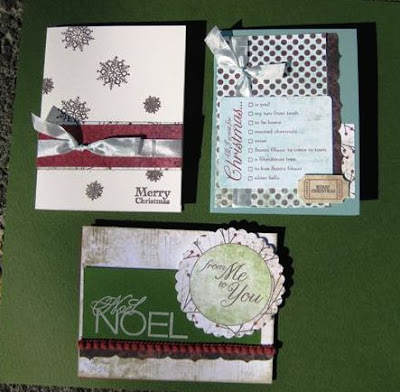
Oh my! My farmer is still harvesting and here I am working on Christmas cards and layouts. Oy! My Minds Eye has done it again ... an incredible line of papers combining the traditional colors of the Christmas holidays with some non-traditional colors thrown in. The best part (and there are always lots of best parts when it comes to scrapping in my oh so humble opinion) is that not only are the patterned papers double-sided, but each side is absolutely one I would add to my Christmas List.
The Christmas Memories layout is one that I 'scraplifted' from the September issue of Scrapbooks, Etc., page 46. I have had these pictures of my kids from 1996 and this was a great opportunity to use them. Thus my theory of not scrapping 'in chronological order' was proven. Hold onto those special pictures and wait for just the right paper or opportunity to scraplift. Products used for the layout were: Cardstock - Bazzill, Patterned Paper: My Minds Eye Holly Jolly line "Winter Branches" & "Reindeer Fly". Within the same line I used the Holly Jolly twine & 'punch outs'. I used my Slice "Just Chilling Teen" to cut the letters for Christmas.
For the cards I used the same products, adding more trims from the Holly Jolly ribbon & trims, and added the Holly Jolly stamps. These were fun stamps. They will be a must for me. The snow flakes, the Merry Christmas stamp ... all perfect sizes and so easy to use. At first I was a little hesistant to use the stamps, since I don't consider myself a 'stamper' but these were easy to use, didn't smudge and even better ... easy to clean.
Lost and Found
It was really fun to work with the new My Mind's Eye Lost and Found collection. The papers and embellishments all sported lots of glitter, which I LOVE, and the palette of Madison Avenue was in one of my favorite color combos, pink and brown.
The photo I chose kind of blended into the page a little too much for my liking, so I grabbed a little pink paint and painted the bird and the vines so they would pop on the page a little more. The "cherish" piece was from the die-cut embellishment sheet, and again I painted the edge in brown to add a little more contrast. I am so very pleased with this layout. The photo does not do it justice, so you'll have to visit the store to see it in person.
One of the coolest things about this collection, in addition to the amazing glittery die-cuts, is that it comes with a coordinating set of acrylic stamps. The dress form and the banner on the second card are both stamped images; I just added a little sewing and a quilt pin to finish it off.
Love the banner. I added some jute and then placed the die-cut banner pieces over it with pop dots. The princess die-cut was a little big for this card, so I chopped it up and then glued it back together to make it the size I wanted. I also cut out the crown and outlined it with cinnamon stickles.
I'd love to see what you're doing with Madison Avenue.
August 22, 2010
My Mind's Eye "Alphabet Soup" Boy collection...
I had the fun of getting to play with the "boy version" of the new My Mind's Eye "Alphabet Soup!" (And, to go along with this adorable new papers collection is my "adorable new" grandson!! :0) Nothing more fun than new papers AND new babies. This collection of double-sided printed cardstock is just so fun, and the deck of alphabet playing cards are the perfect embellishment! Besides using the alphabet cards on the layout they are perfect to use on these note cards.
August 18, 2010
My Minds Eye-- Haunted
I had a lot of fun scaring up some ideas to use with the new "Haunted" line from My Minds Eye. The kraft paper look was a fun element for the halloween theme.
It's natural look inspired me to stop alongside the roadside on the Palouse in August where you can find dried up flora... to make into a witches broom! Most all the other elements on the page are from the MME Haunted line or other MME products (i.e. the "Lush" letters).
The second layout came from the pattern paper that had several fill in the blank spots for recording halloween memories. I let my 9-year old illustrate the costumes we wore this last year to be recorded from HER memory instead of just mine... a fun way to change up your pages!
And lastly, the cards were fun to do-- I used the new acrylic stamps from the Haunted line to spook up some fun greetings. I also tried out Glimmer Mist for the first time and sprayed a ghost onto one of the cards. I like the way that turned out!
Are you ready to scrap some halloween??? Get Haunted.
August 15, 2010
My Mind's Eye-Alphabet Soup and Lost & Found
More paper and goodies to love. The little creatures on this pattern paper are so adorable. This line is called Alphabet Soup Girl. I got to work with "Powder Puff", "Zoo Cuties" & "Little Princess" pattern paper. All double sided. The Accessory sheet has more cuteness to add to your pages. One of the best things about this project was I got to work with the "Alphabet Cardstock Card Set". There are 52 cards with 2 of each card. These cards are so cute I wanted to plaster them all over my layout. I stitched around some of those cute animals and added glossy accents to their eyes.
I made a pocket on this card and inside I put the cards L-O-V-E. The accessory sheet had two of these little girls on it. This My Mind's Eye line is called Lost & Found. Madison Avenue "Cherish" Pintuck Paper, Madison Avenue "Pretty" Polka Paper& Madison Avenue "Girlfriends" Lovely Paper with stickers, ribbon and letter stickers to match. As usual with the double sided I can't pick because they are all so pretty pretty. I got to pretend to be a quilter on this page. The banner I cut out from the "Girlfriends" paper. Check out the ribbon. It is ribbon sewed onto crepe paper. How delicate. I made a little crepe paper flower. The letter stickers are already glitterized. No messing with glitter
August 4, 2010
Printer Tray Class & A Challenge for You
What a fun class this was!!! Oh my goodness, Karen & Shawna's knowledge in class facilitation and their willingness to 'open' our minds to go past their 'samples' are incredible. After taking this class I was hooked on signing up for more classes. Now ... if I could get more hooked on their classes I'd be in 'paper' heaven. Before I share my finished product, let me tell you about the treasure box. I forgot to take a picture of mine, but let me tell you this -- it truly was full of treasures and I plan to keep filling it up so when I need to get a creative 'nudge' I will reach into my treasure box and that 'treasure' will fill just 'hole' that might be missing in a layout, project or some other scheme I've going.
I'd like to hear your experiences and see your end results of classes. I was kinda sad to hear the Ranch Mini-Album class was cancelled due to lack of participation. Being a ranch kind of gal, I was so looking forward to this. So ... my challenge to each of you, make a goal to sign up for X amount of classes per year. Get your girlfriends together and make it a party. The printer drawer class was my birthday party to me and I was able to catch up with a dear friend while being creative, getting feedback from her on what looked right or what didn't and we even traded treasures.
So what class are you signed up for next?
Subscribe to:
Posts (Atom)